In this article, you will learn how to create bootable macOS Catalina USB Installer Drive. If you have thinking that why should we make USB Installer? Then the answer is simple. When you are going to install macOS Catalina on multiple Apple laptop and Desktop computers. Then, to download and install macOS Catalina one by one on each machine consumes much time and data. Therefore, you have to make simple bootable USB installer drive and start to install it on multiple machine without downloading again and again.
However, another fact is to make dual operating system on single machine. For example, you can run both macOS Mojave and Catalina. Because, the latest operating system is on beta version. Which means that it is not stable. Further, there are bugs and problem related to different software. Therefore, it is best practice to install beta operating system on different drive with USB Installer. Which gives you more freedom to test various application. Further, you have no fair to loose your time and energy to restore in case you find bugs.
Contents
- Opt Flash Drive
- Step 1: Download macOS Catalina
- Step 2: macOS Public Beta Access Utility
- Step 3: Install macOS Public Beta Access Utility
- Step 4: Download macOS Catalina Updates
- Step 5: Quite macOS Catalina Utility
- Step 6: Open Terminal
- Step 7: Write Terminal Commend
- Step 8. macOS Catalina USB Installer
- Step 9: install macOS Catalina USB Installer drive
Opt Flash Drive
Since, we are going to install macOS Catalina from Flash Drive. Therefore, you need USB Flash Drive. You must have minimum 8GB of storage of Flash Drive. However, if you are not out of budget. Then it is better idea to get more storage for USB drive. Because, you will get much more space, in case you are going to add more application or software.
For the purpose of these tutorial, i am using 16GB SanDisk. Which has two connect both for micro_USB for mobile and USB 3.0 for laptop and PC. Therefore, I recommend SanDisk 64GB Ultra Dual m3.0 USB 3.0.
The drives comes with minimum 8GB to 256GB. Therefore, you have varieties of option to select one. However, if you are thinking to get extra storage. Then it is best idea to get External Hard drive with 1TB. Where you can store more data without any restriction.
How to Create a Bootable macOS Catalina USB Installer Drive
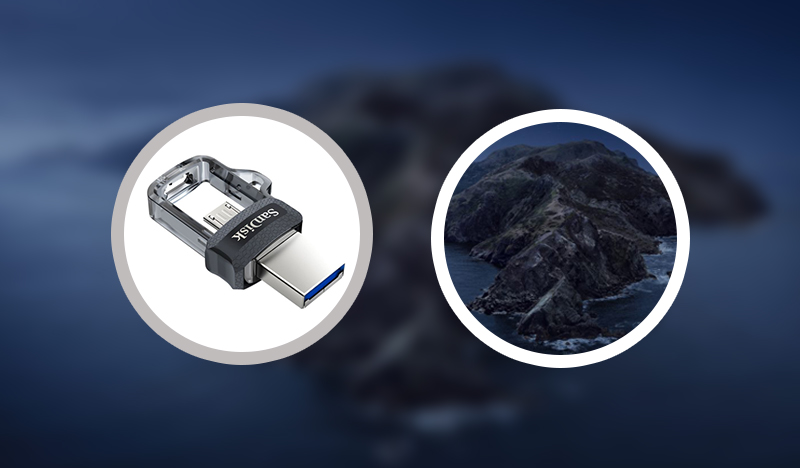
Create a Bootable macOS Catalina USB Installer Drive
To create a a Bootable macOS Catalina 10.15 USB installer drive. Simply follow the steps below.
Step 1: Download macOS Catalina
First you have to download macOS Catalina. There are two version of macOS Catalina at the moment. The first one is macOS Catalina Developer Beta. You can download that from Apple’s Developer portal. Further, the second one is macOS Catalina public beta. Where you can easily download that from Apple Public beta Website.
However, I recommend, you should download macOS Catalina public beta.
Step 2: macOS Public Beta Access Utility
Once you have download the Public Beta. Then you have to open the dmg file. Then you will see a windows of macOS public beta access utility will appears. Therefore, you have to double-click on installer package.
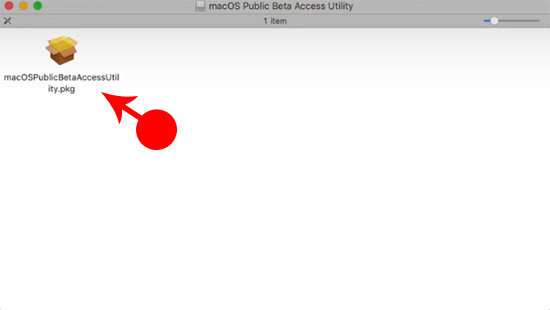
macOS Catalina dmg
Further, it will warn you about No Time Machine backup detected. However, it is best practice that when you are going to update. You must take backup of your machine.
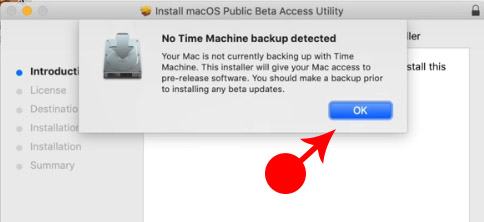
Time Machine Backup
Step 3: Install macOS Public Beta Access Utility
In this step. I wizard will appear. Therefore, you don’t need to do much. However, I will simple guide you through this wizard as well. How you are going to deal with it.
1. First wizard page is about introduction. Therefore, you have to click on Continue.
2. Then it will take you to license. Therefore, you have to click on Continue. Then, to continue installing the software you must agree to the terms of the software license agreement. therefore, you have to click on Agree.
3. Now Click on Install on installation type.
4. Enter User name and password and click on Install Software.
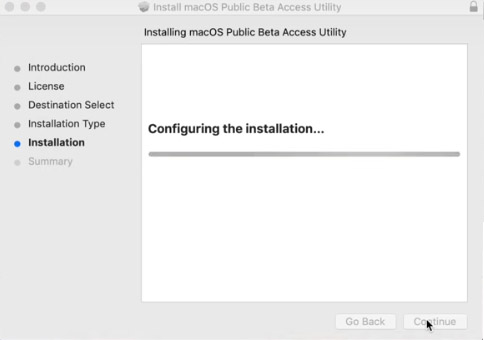
Install macOS software
Step 4: Download macOS Catalina Updates
Similarly, you will see Software Update window. Therefore, you have click on update software. Since macOS Catalina is big size. However, it will take some time to download. Therefore, you should wait for the downloading to completes.
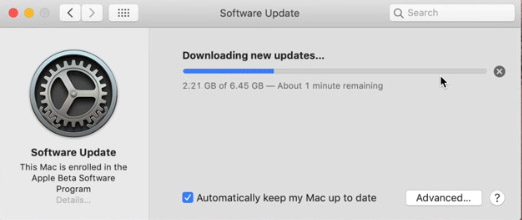
macOS catalina Updates
Step 5: Quite macOS Catalina Utility
After downloading will completes. You will see installer macOS Catalina Beta utility. However, you should not continue that utility. Because, we are not going to update operating system. But, we are going to make macOS Catalina USB Installer. Therefore, you have to close the window.
Step 6: Open Terminal
Now you have to Open Terminal. For that you simply follow the steps below.
1. Open Finder.
2. click on Applications.
3.Then you have to open Utilities folder.
4. Next you will see the Terminal. Therefore, you should open the Terminal.
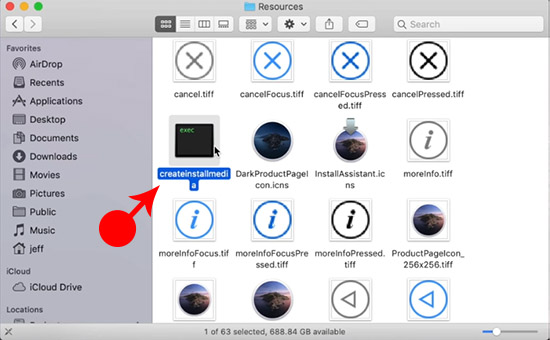
macOS Catalina Terminal
Step 7: Write Terminal Commend
As you Terminal is open You have to write following commend.
Sudo /Applications/Install\ macOS\Catalina\ Beta.app\Contents\Resources/createinstallmedia –Volume /Volumes/
Then you have to open the Go Menu. click on Go to Folder. Then you have to click on /Volumes. Further, click on Go.
Next you have to plug your USB Drive. Then you will find the your USB Drive will appears on Volume Folder. Therefore, you have to drag that on Terminal. Next, you have to press Return on Keyboard.

Terminal Commend
Further, it will ask about password. Therefore, you have to enter password and press Return. Then it will ask if you wish to continue. Then you have to type Y and press return.
Finally, you have to wait for files to copy on USB Installer Drive.
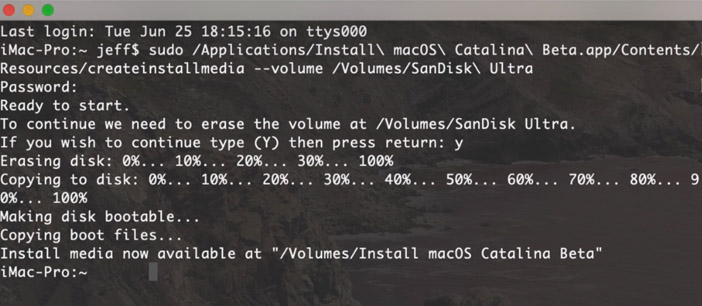
File Copy to USB
Step 8. macOS Catalina USB Installer
Congratulation, you have successfully create a Bootable macOS Catalina USB Install Drive. Therefore, Now you have to unplug the USB. Then you are install macOS Catalina to any Mac machine which you want.
Step 9: install macOS Catalina USB Installer drive
Once your USB is ready. You have to take that USB and plug it to the Mac machine on which you want to install Catalina. Then you have to start MacBook. But, remember you have to hold down Option key. Then you will see the boot option.
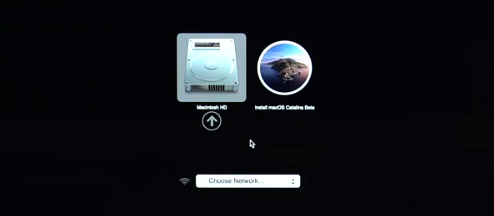
macOS Boot
Now you have to select. macOS Catalina and continue to install it. The installation is simple. You have to follow the instruction on each wizard page. There will be no technical difficulties. Therefore, you will easily install it on your MacBook.
However, if you want to install macOS Catalina on VMware or You want to install macOS Catalina on VirtualBox. Then, it is better to test it on virtual machine.
conclusion: I hope you find this article useful. However, if you want to add your opinion or suggestion. You are most welcome to add in comment below. Thank you.

thomas
Failed! Once I make the bootable USBC drive and turn off T2 security. I option boot into the USBC drive. USBC drive boots with the option key to USBC drive boots with an option to update disc or switch start up disk once I hit update disc once I hit update. disc reboots on USBC drive in the process repeats “update disc or reboot on USBC drive” . In install occurs.
Josh
I was able to get the MacOS on Virtualbox up and running without any issues, except USB passthrough does not work. So I would like to try and make a hackintosh, but cannot follow these tutorials as I do not have a Mac (and as said previously, USB passthrough is not working in virtualbox) 🙁