In this article you will learn how to install macOS Mojave on VMware Windows 10 PC. As you know that macOS Mojave is the latest operating system release by apple. It is the 10.14 version. There are dozens of amazing features in recent release of macOS Mojave. For example, you get better performance, security and beautiful UI from the best out of the best developer and designers. However, if you are going to install the operating system in your machine. First, you have to test and check either, it is worth installing in your machine. Therefore, the best platform to test macOS Mojave is either VirtualBox or VMWare. However, we have already install macOS mojave 10.14 on virtualbox on Windows 10. And Provided all the setting as well as the troubleshooting. But, in this article, we are going to install MacOS Mojave on VMware Windows 10 PC.
Why to install macOS Mojave on VMware

VMware is virtual machine. Which is one of the best software for testing different operating system in one PC. For example, if you want to test Both Windows 10 and macOS Mojave at the same time. Then VMware Virtual Machine does that with great flexibility. Therefore, most of the developer. Try to check the operating system first on virtual machine. Before, moving actually on real and physical machine. Therefore, it save both time and money.
Therefore, we are going to install the macOS Majave on VMware. Further, we are going to test all the cool features. But, we don’t know if it is cool. However, install and testing it on virtual machine will definitely give you a sense to understand all the features of macOS Mojave.
macOS Mojave 10.14 VMware image Download
Before, doing anything else. You need macOS Mojave 10.14 VMware image to download. If you are considering that what is VMware image. Then it is like a CD/DVD with which you are going to install your operating system. Since, we are going to install macOS Mojave on virtual machine. Therefore, we don’t need CD/DVD or USB to install the operating system. Instead, we are going to use digital file and take that as a installing medium. Therefore, You need to download macOS Mojave vmdk file. Moreover, vmdk file is a medium use instead of CD/DVD or USB. Therefore, below is the files which you must download in your PC.
New Update:
macOS Mojave 10.14.3; 18D109 (February 7, 2019)
- Google Drive (One Full): Download Link
- Google Drive (6 of 6): Download Link
- Media-fire (One Full): Download Link
macOS Mojave Final 10.14.0 – 18A391 (September 24, 2018).
- Google Drive (One Full): Download Link
- Google Drive (6 of 6): Download Link
- Media Fire: Download Link
Patch Tool For VMware
VMware by default has no option where you can install macOS Mojave. Therefore, you must configure VMware for installing macOS Mojave. For doing so, you can use the patch tool. And that will make new setting where you can easily install macOS Mojave. However, don’t worry now about installing and configure the patch tool. We will further show you, how you will setup the setting.
Install macOS Mojave 10.14 on VMware on Windows
We are going to start the installation process. Moreover, you will learn how to install macOS Mojave step by step. Just follow the steps below.
Further, if you want to Install latest macOS 10.15 Catalina on VirtualBox and VMware. Then check these link below.
Contents
Step 1: macOS Mojave Virtual Image
First, you have to extract the virtual image file. However, you have already find that the file is compress. Therefore, you need third party software to extract the virtual image file. For that, we have download link from Below.
Winrar: https://goo.gl/PQHT
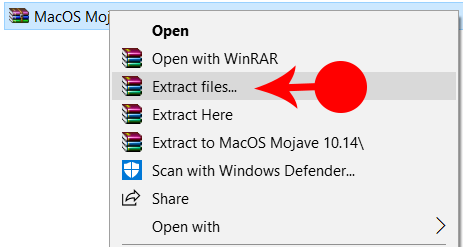
After downloading.You should install the software in your windows 10. The procedure of installing Winrar is simple like all other software. Therefore, next you are going to extract the file. For that you have to go to the folder containing the virtual image file and right-click on Rar file. Then select Extract Here.
After downloading.You should install the software in your windows 10. The procedure of installing Winrar is simple like all other software. Therefore, next you are going to extract the file. For that you have to go to the folder containing the virtual image file and right-click on Rar file. Then select Extract Here.

Step 2: Install VMware Workstation
In this step you are going to install VMware workstation. First you have to download the software from the link below.
VMware Player: Free download
When you have downloaded the software. Next, you are going to install it with simple wizard. Since, the installation is simple. Therefore, you will not find any difficulties to configure the software.
Step 3: Patch For VMware WorkStation
Here you are going to patch VMware Workstation. For doing this, you have to download the patch tool from below.
Patch Tool: Download
Now you have to extract the folder. Moreover, you have to open the folder. There you will get win-install file. Right Click on it. And click on Run as administrator.

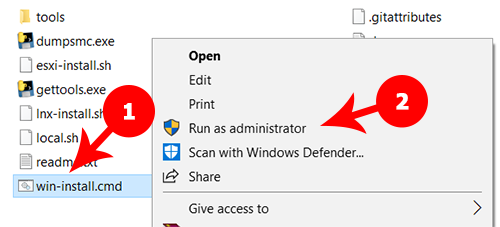
Here you will see a black window will start configure. Let it completes. Then you will start making New Virtual Machine.
Step 4: New Virtual Machine on VMware
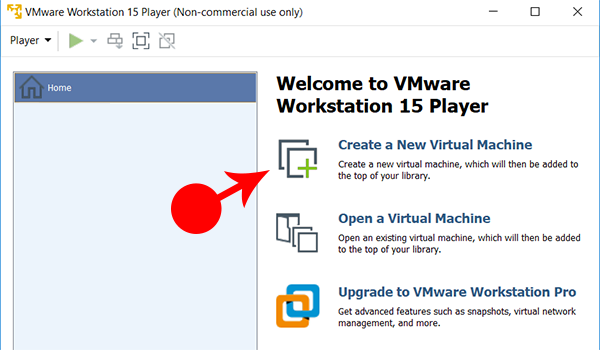
1. Open VMware Workstation and Click on Create a New Virtual Machine.

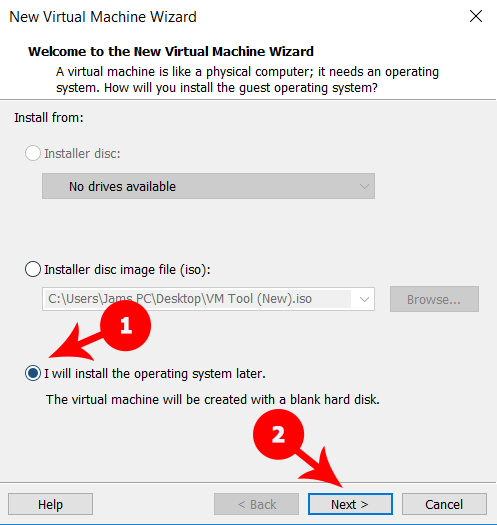
2. Here you will get New Virtual Machine Wizard. Therefore, you have to click on I will install the operating system Later. And Then click on Next.

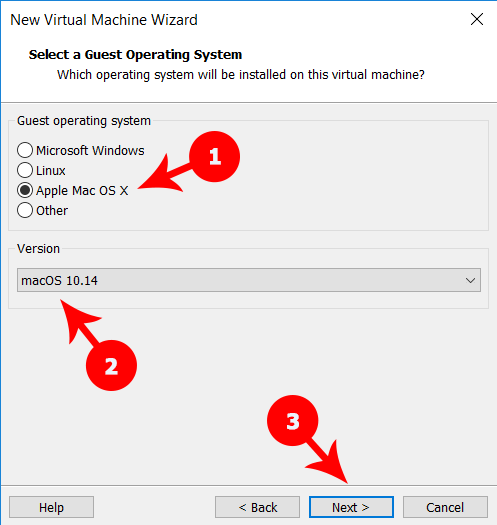
3. Further, you will get Select a Guest Operating System. You have to select Apple macOS X. In the version Selectoin you have to click on macOS 10.14. Then Click on Next.
4. In the step you will be asked for Name the Virtual Machine. There are two categories.
- Virtual machine name: Here you have to write the name of your macOS. However, you can write any name which you want.
- Location: You have to select the location where you are going to save all the data.
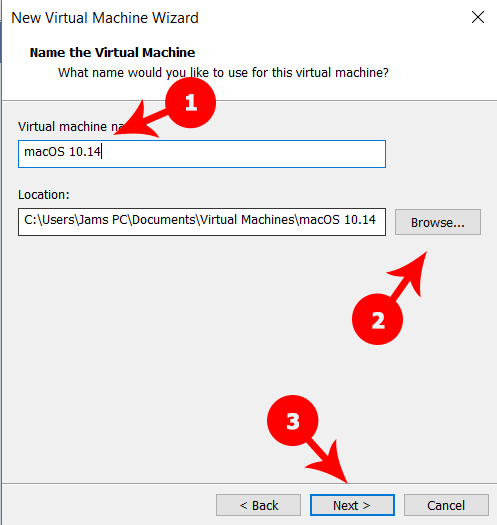
When you have filled both the selection. Then you are going to click on Next.
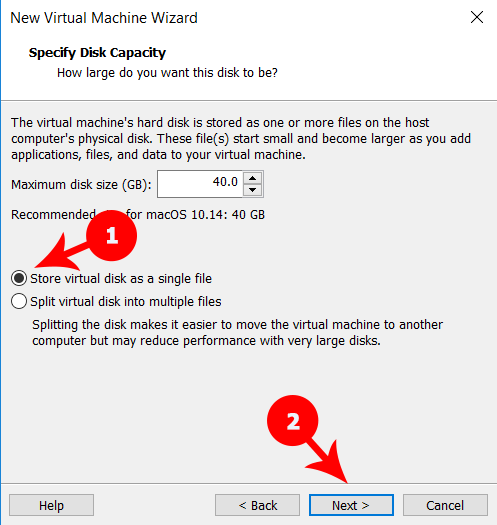
5. Next you will get Specify Disk Capacity. You have to let the default 40 GB. However, it is the recommended size. Then select Store virtual disk as a single file. Finally, click on Next.
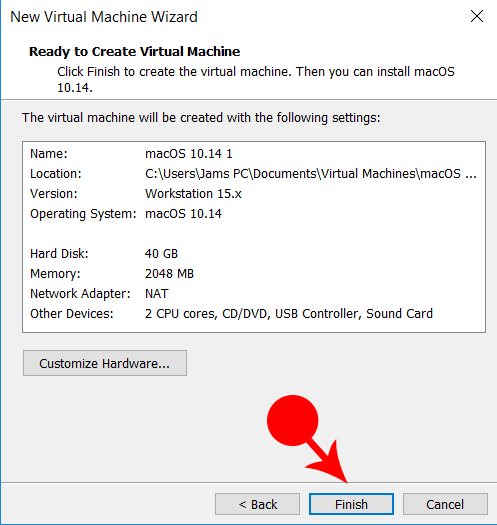
6. The VMware is ready to create virtual machine. Therefore, you ave to click Finish to create the virtual machine. Then you can install macOS 10.14 Mojave. However, you can also see all the setting which you have already setup in the wizard. Moreover, if you want to change anything . You can do that by click on back.
Step 5: Configure Virtual Machine
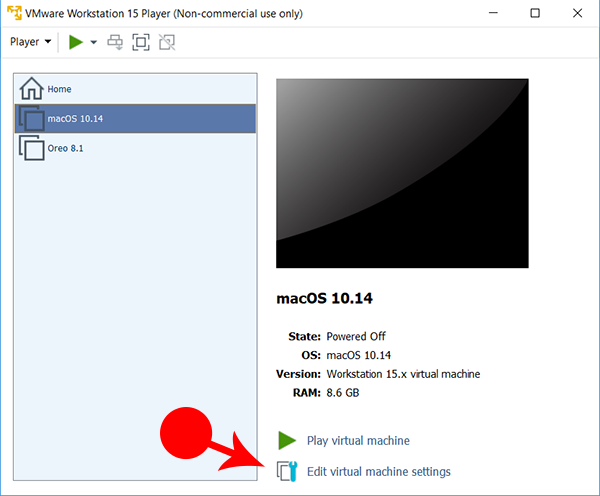
In this step, we are going to configure VMware correctly to run macOS Mojave 10.14. For that you have to click on Edit virtual machine setting.

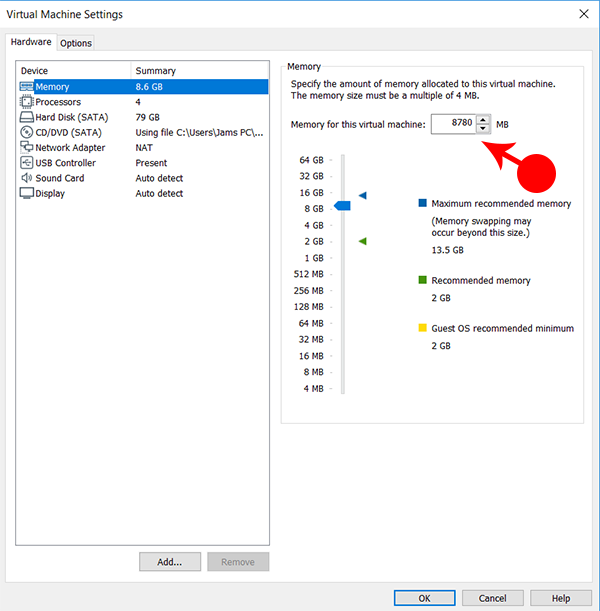
1. Memory: Specify the amount of memory allocated to this virtual machine. I recommend that you have to provide you 50% plus of your memory to virtual machine. Because, it will run smoothly.

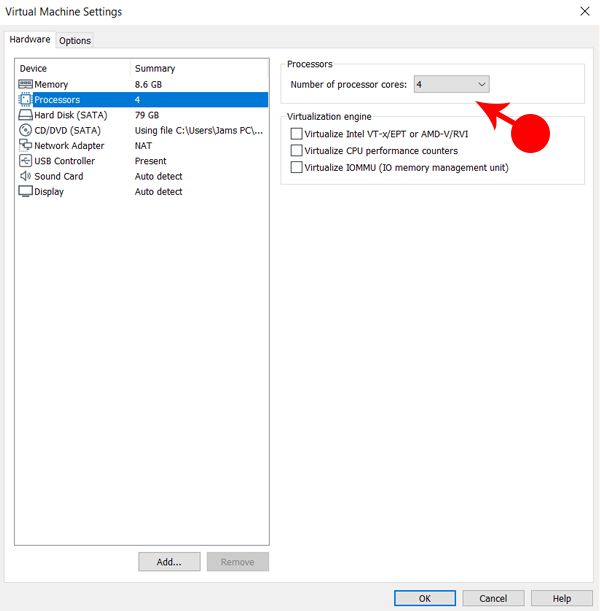
2. Processors: Select the number of core in your processors for the virtual machine. I recommned to select for the processor more then 50%.
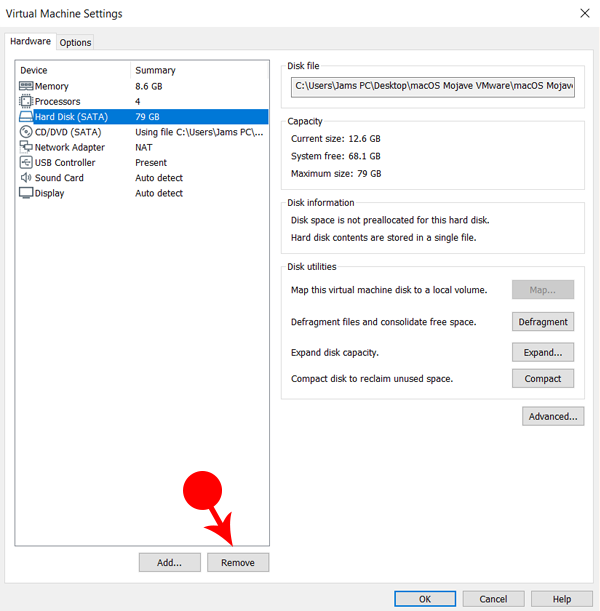
3. Hard Disk: Here you are going to select and configure the hard disk. However, First you have to click on Remove button at the bottom. It will remove the virtual hard disk which we have created while in the wizard.
Now click on Add
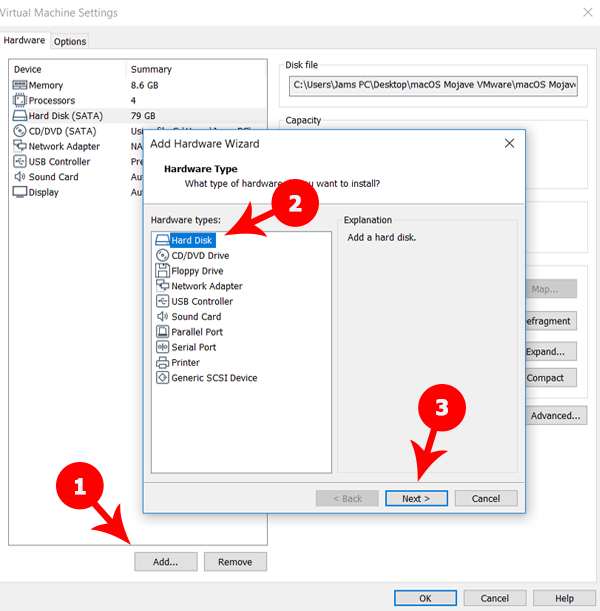
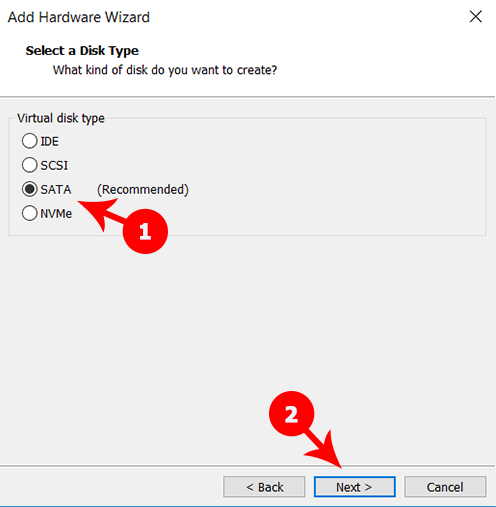
You will get Add Hardware Wizard. Select Hard Disk and click on Next. Then Select SATA which is recommended. Then Press Next.

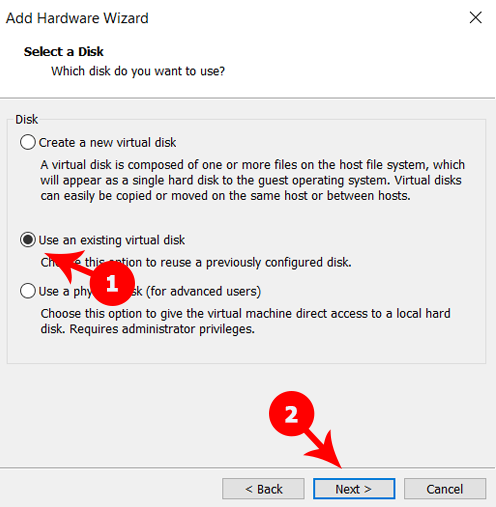
Here you will ask about which disk do you want to use. You have to clcik on Use an exiting virtual disk. Then press Next.
You have to click on Browse… And choose macOS Mojave. Which you have already downloaded. Then Click on Finish.
A window will prompt ask ing about Converte existing virutal disk to newer format. Just click on Keep Existing Format. Finally, click on Ok. And you are done.
Step 6: Edit The VMX File
Before, to install macOS mojave on virtual machine WMware. You need one last tweaking too. For that you have to edit the VMX file. First, you have to open macOS 10.14 folder where you have store the files. f you did not specify its location, look in Documents\virtual machines\.
Right click on the VMX file and choose Open With. Choose Move Apps. From the list of apps that will be seen, choose NotePad and Press Enter.
The the bottom of the file you have add the code from below.
smc.version = “0”
Save the file by Pressing Ctrl + S
Step 7: Install macOS Mojave 10.14 on VMware
1. First open VMware player. Further click on play virtual machine. Then you will see the Apple logo with black screen will appear. It means you are going to right direction.
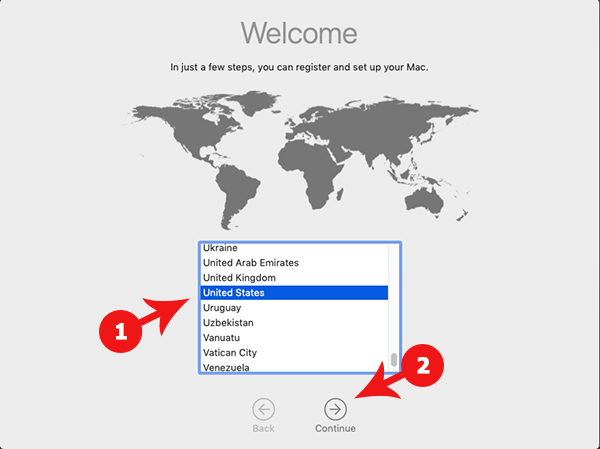
2. The welcome Screen will display. Here you are going to register and set up your Mac. Therefore you have to click on Country and click Continue.

3. Next screen will ask you about to Choose a keyboard layout. Select U.S and click on Continue.

Select Keyboard
4. In this screen you will ask about the Data and Privacy. Therefore, read it carefully and the click on Continue.

Data & Privacy
5. Further, this wizard will ask you about Transfer Information to This Mac. It will ask that how do you want to transfer your information? Check the box on Don’t transfer any information now. and click on continue.

Transfer information to This Mac
6. At this stage, it will ask you about your Apple ID. As you know that with the help ID you can use many feature of macOS. Therefore, if you have any apple ID enter it. But, for you I will select Set UP Later and click on Continue.

Sign in With Your Apple ID
7. Finally, it will ask about Term and conditions. Simply click on Agree.

Term and Conditions
8. Create A computer Account. Fill out the following information to create your computer account.
- Full Name: Write you name.
- Account Name: It will select automatically.
- Password: write your password to log in in your mac. There password may be thing. Further, write same password in verify too.
- Hint: write something memorable about your password. When you forget your password. The the hint will help you to find it back.
- Finally, Press on Continue.

Create a Computer Account
9. on the page of Express Set Up just click on Continue.

Express Set Up
10. Here you will ask about Choose the Look your macOS 10.14 Mojave. There are two variation. The first one is the light. The second one is Dark version. Select the one which you want. However, I select the light one. But, don’t worry much about that because you can change this later by going to system preferences.

Choose Your Look
11. Congratulation, you have done great. Now at this screen it will setting up your Mac. It will take sometime for configuration. Then you will see your macOS 10.14 Mojave for the first time.


macOS 10.14 Mojave on VirtualBox
Step 8. VMware Tool For Full Screen Mode.
At this stage everything will work fine. However, you don’t get the macOS Majove with full screen. When you are going to make VMware to full screen. It will show you black screen at the sides of the VMware. To solve that problem you have to install VMware Tool. Therefore, follow the steps below to configure VMware too to get macOS Mojave full screen resolution.
To install VMware tool, you must click on Player. Therefore you have to click on Removeabe devices. Then go to CD/DVD and Click on Setting. Select Use ISO image file. And Browse the file VM Tool.iso. The download link is below.
VM Tool: Download
Now Click OK. And also check the connected button and click OK.
Next, VMware tools window will open up. Then you have to double click on Install VMware Tools. In this step you have to enable VMware system extension. You can easily do that while clicking on Open Security Preferences. The on Security & Privacy windows you have to click on Allow. Finally, click on Restart button to restart the virtual machine.
Congratulation, You have successfully installed macOS 10.14 Mojave on VMware on Windows 10. Enjoy!
Video Tutorial
Here is the video tutorial where we will take your through all procedure step by step. Watch the video you if you have yet configure macOS mojave on VMware workstation.
Final Words
I hope everything work perfect. But there is the possible of the any error or troubleshoot. Therefore, for any problem. You have to write in comment box below.