In this article, you will learn how to install Android 8.1 Oreo For PC in Virtual machine for both VMware or Virtual Box. As you know that, Android is operating system for mobile phones. However, if you want to see the android 8.1 Oreo on your PC. Then that is the perfect place to install correctly The operating system. Since we are installing that directly on PC. Therefore, testing it with perfect understanding is our priority. And we are going to lead you how you are going to install Android 8.1 Oreo correctly on your PC.
Moreover, the exact question is that why you should install the Android 8.1 Oreo for PC. However, if you want to check the application straight on the operating system. For which you are going to test. Then it will give you more sense of understand that how the application will work. Further, the developer requires exactly same environment to check the application, software or game etc. And sometime using different operating system. Like Install MacOS Mojave on VirtualBox on Windows PC.Therefore, for testing beta version on virtual platform is really give you the outstanding experience.
Further, for installation Android 8.1 Oreo for PC we need a software to support the operating system. it needs virtual machine for Installing on PC. Therefore, There are many virtualization software out there. However, the most reliable software which have all the best features are two. The First one is the VirtualBox and second is VMware. VMware is also best for the Instlling macOS Mojave 10.14. These both have free as well as paid version. But, the free version has all option which will work best out of the best.
Downlaod Files For Android 8.1 Oreo For PC

We are now going to install android Oreo 8.1 for PC. Before, we go to actual installation process you have to download some essential files. These files are below.
- VMWare Player: bit.ly/2Q332GR
- Android Oreo Disk IOS: bit.ly/1jviil6
After downloading this two files. you have to go to the installation process.
Install VMware Virtual Machine for PC
The first file which you have downloaded is VMware virtual machine. I belief that you already have installed the software. However, if this is not the case. Then you have to install the software. Since installing the VMware is simple as you install all other software. Therefore, you will not face any problem.
After you will install the VMware successfully. Then I will take you to installation for Android Oreo 8.1
Configure VMware For Android 8.1 Oreo For PC
Now you are ready to install Android 8.1 Oreo for PC in your windows. For doing so. You have to follow the steps below.
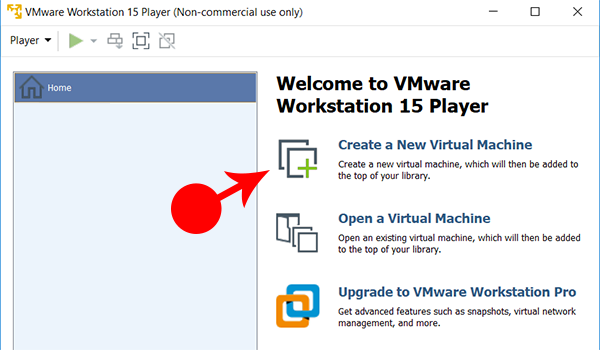
Step 1: Create a New Virtual Machine: When you are going to open the VMware on the right side you will see different option. You have to click on Create a New Virtual Machine.

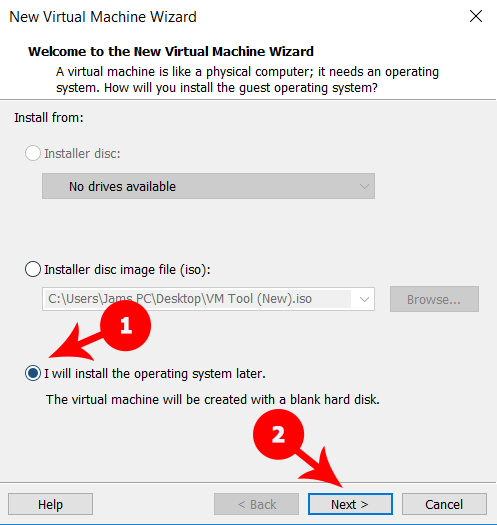
Step 2: You will see a new window which is called New Virtual Machine Wizard. It will give all information about making and creating New Virtual Machine. However, you have to make sure to select I will install the operating system later. Further, click on Next. Therefore, you will get Virtual machine with blank hard disk. Why we are doing this? Because, in coming up next steps we will use the file and change it. However, don’t worry much now.

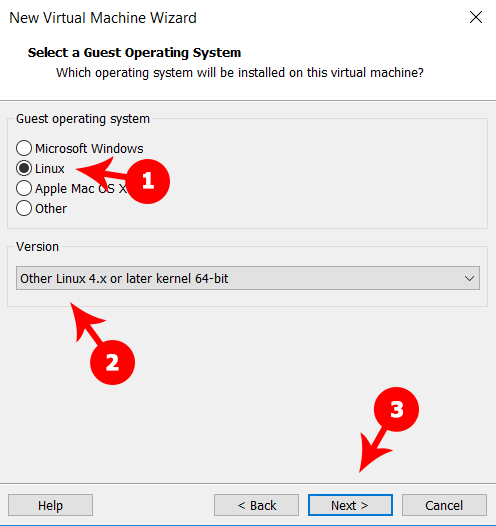
Step 3: Moreover, you will ask about the selection of a guest operating system. Guest operating system is the one which you are going to use. Because. There are many operating system where you can use in virtual machine. However, You have to select Linux in Guest Operating System. And in version you have to select Other Linux 4.x or later kernel 64-bit. Then you are going to click on Next.

Step 4: Similarly, in this step, you are going to give your operating system a Name and select the location. For name there is no restriction. You can choose any name which you want. However, I recommend you have to Name your virtual machine similar to operating system. Therefore, I am going to select Oreo 8.1. For the location you let that to be default. However, If you want to change the location to something else. You can change that. It will not effect anything.
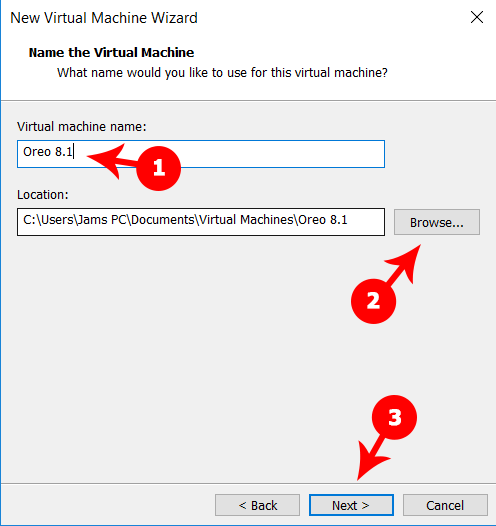
Finally, you have to click on Next.
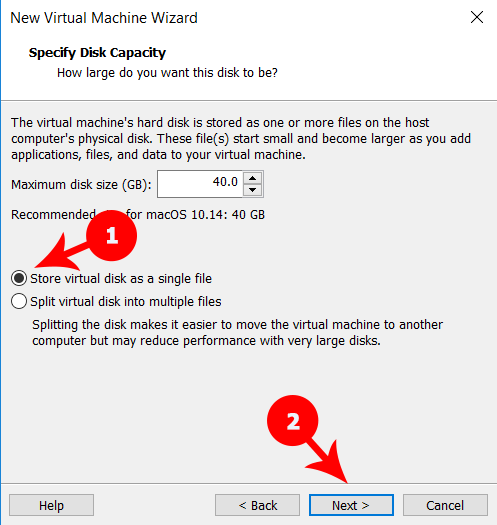
Step 5: Next, you must Specify Disk Capacity. Which mean you have to assign the memory space to Android 8.1 Oreo. Since, The virtual machine’s hard disk is stored as one or more files on the host computer’s physical disk. These files start small and become larger as you add applications, files and data to your virtual machine.
Therefore, You have to choose as much memory you want. But the minimum requirement is 8 GB. Further, you have to select Store virtual disk as a single file and Click on Next.
Finally, You will get a screen Ready to Create Virtual Machine. There you have to make some Customization. therefore, you have to click on Customize Hardware…
Step 6: Customize Hardware: Here you will get different hardware setting for the your virtual machine operating system. Therefore, we are going one by one to configure each hardware.

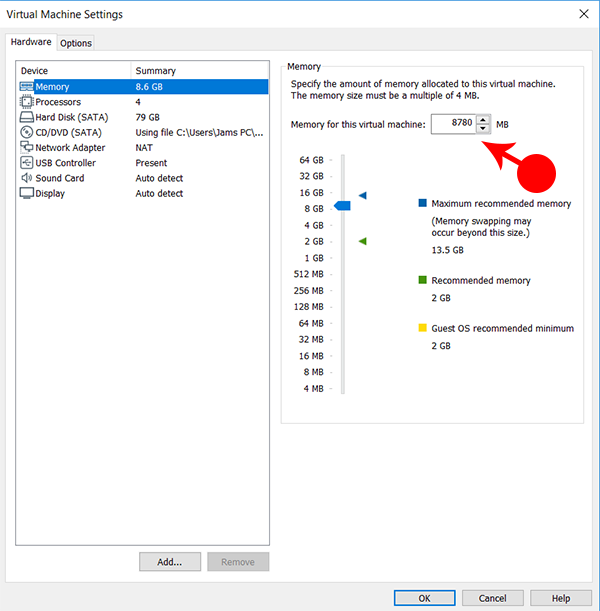
1. Memory: For the memory you have to specify the amount of memory allocated to this virtual machine. How you are going to assign the memory. You should assign 50% or more of your main memory. For example, I am 16 GB memory. And I have assigned 8 GB memory. IF you have 8GB memory. Then you have to assign 4 GB memory.

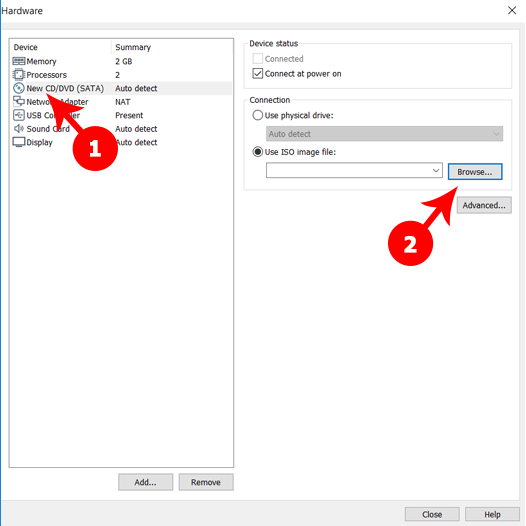
2. New CD/DVD (IDE): You have to to select the ISO file for the android 8.1 Oreo. Therefore, you have to select Use ISO image file: and click on Browse… Further, select the ISO image file from the location which you have already downloaded and click on Open.

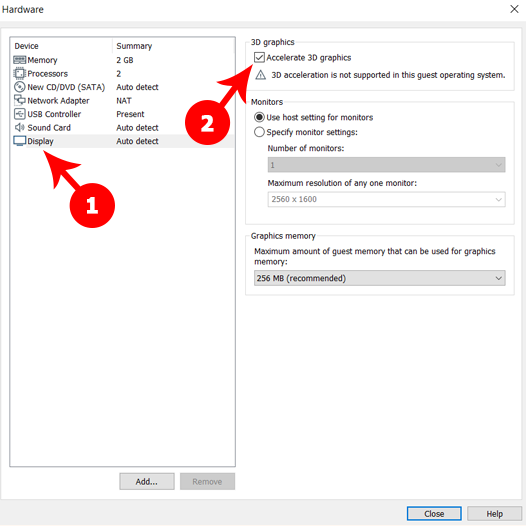
3. Display: Next, you must click on display. You will see 3D graphics and at the bottom There is Accelerate 3D graphics. Click on that one.
Finally, you have to close the Hardware windows. and Click on Finish.
Install Android 8.1 Oreo For PC Windows 10
Everything is ready. Now you have to install Android 8.1 Oreo for PC on Windows. For that you have to follow these Steps.
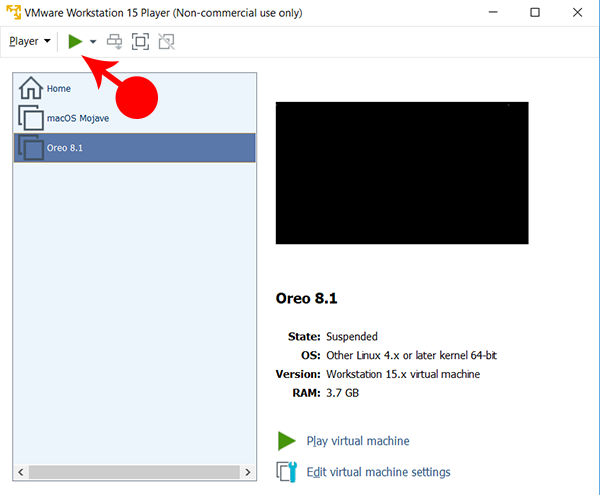
Step 1. Select Oreo 8.1 and Click on Power ON. It will start VMware for further installation.

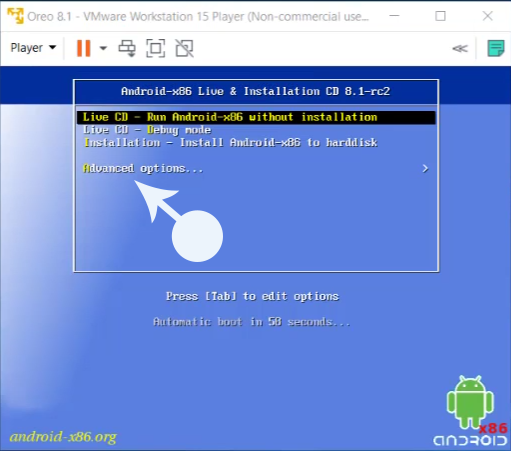
Step 2. In this step you will get a blue screen. On the top it will ask for installation. You have to select Advanced options… Then Press Enter.

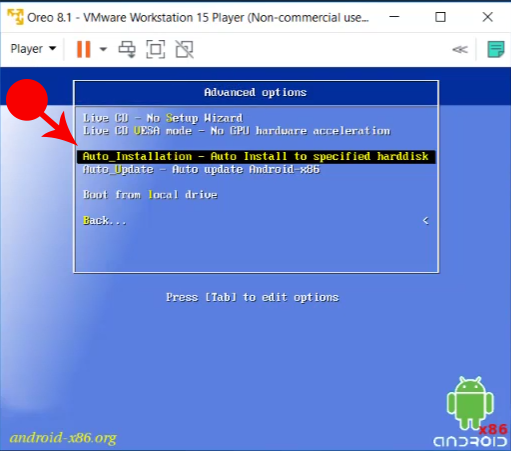
Step 3. In Advanced options you will get many more option. Therefore, you have to click on Auto_installation – Aut Install to specificed harddisk.
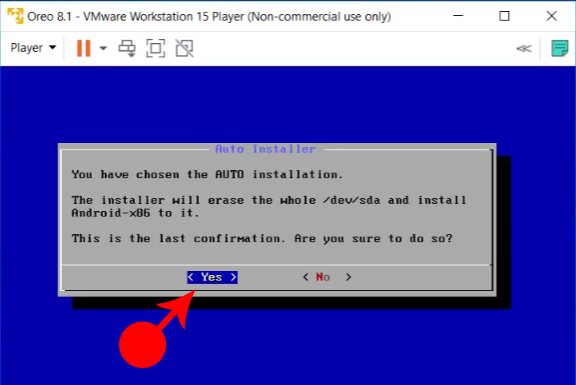
Step 4. Now you will get Auto installer window. You have to click on Yes. Thought it ask you that the installer will erase the whole /dev/sda and install android x86 to it. However, don’t worry about the erase part. Because you have completely assign it as a separate part of your hard drive. Which has no data on it. Then it will star formatting the hard drive. Further, it will install the Android 8.1 Oreo. Therefore you have to wait the process should complete.

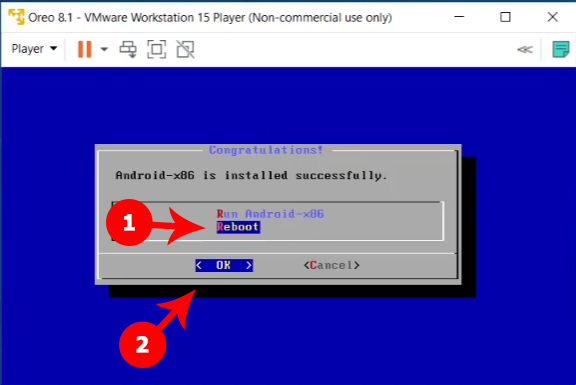
Step 5. The congratulation window will appears. Therefore, you have to select on Reboot and Click on OK
Step 6. After reboot you will get a black screen. You have to Press E.

E means edit. Therefore, we are going to edit the code. Then you have to move the cursor to the left side. And There you will find ‘quite‘. You have to remove it. and instead write the code from below.
nomose xforcevesa
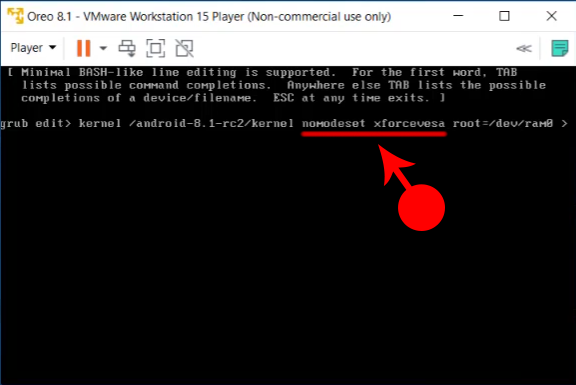
When you have replaced. Then you have to Press Enter. Then Press B. You will see it will install the operating system. And then VMware will restarts.
Setup Android 8.1 Oreo For PC Windows 10
After restarting you will see that now you are actually on Android 8.1 Oreo. there you have to configure some more simple steps before you will get your home screen. Therefore, follow these simple steps.

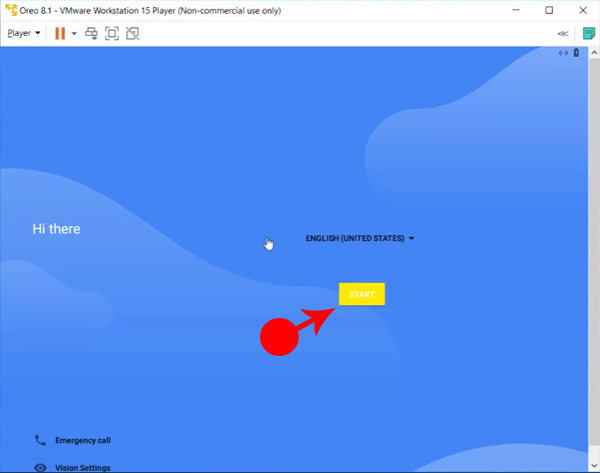
Step 1. First you will get the language selection. You have to select any language which you want. However, I will select English Language. And then Press Start.
Step 2. It will check the updates. It will take sometime. Therefore, you have to wait until it completes
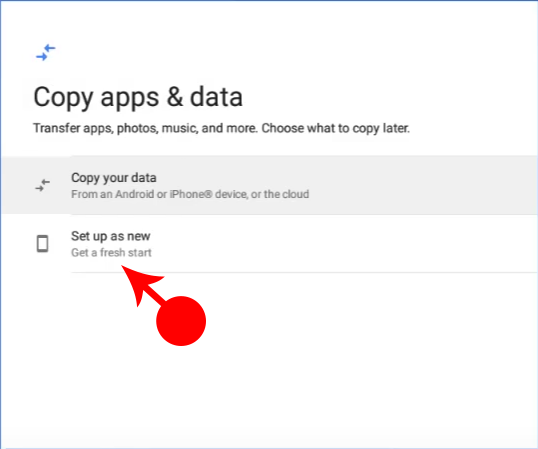
Step 3. Further, it will ask about copy apps and data. Here you have to select Copy your data.

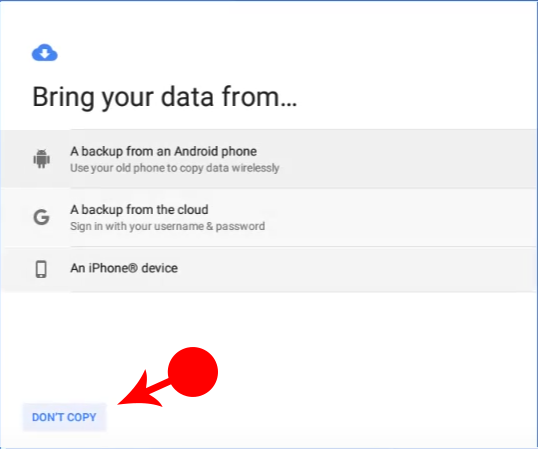
Step 4. Here you will ask about the bring your data from. However, you must click on Don’t COPY.
Step 5. It will start checking the info. But, you have to wait if should completes.
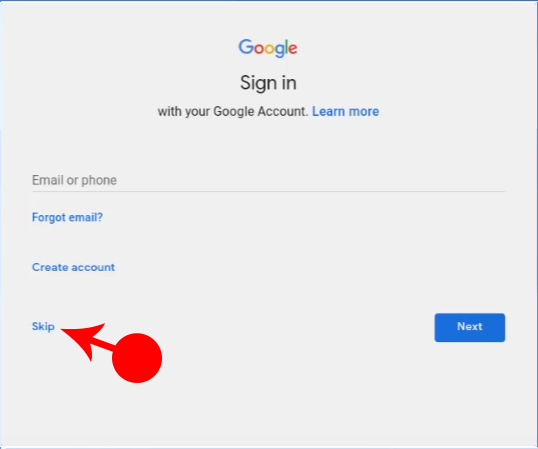
Step 6. In this screen. It will ask about the Google Account. If you want you have to enter your email. However, I will Click on Skip for now.
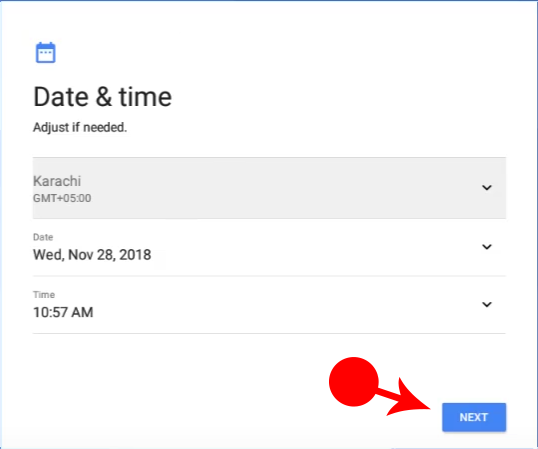
Step 7. Moreover, you have to select Data and Time. and click on Next.
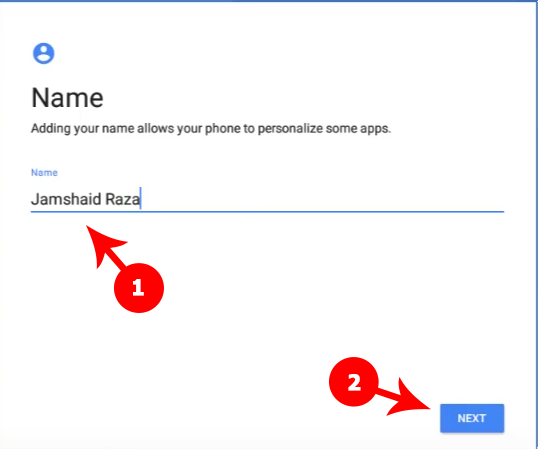
Step 8. Here you are going to add name. Therefore, you have write any name which you want and then click on Next.
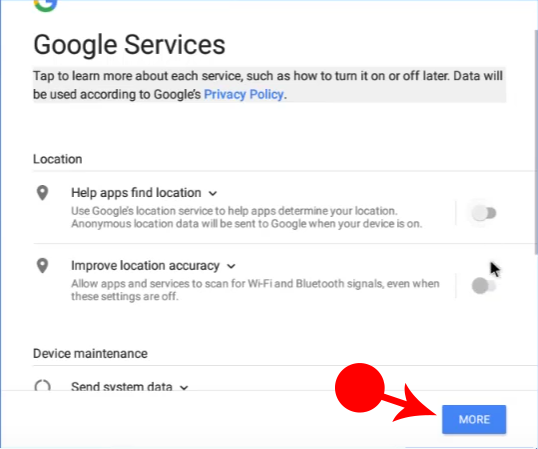
Step 9. Next, it will ask about the Google Services. There are something like Google Location Services. Either, you have turn it on or off. It completely depends on your. However, have turn it off and click on I AGREE
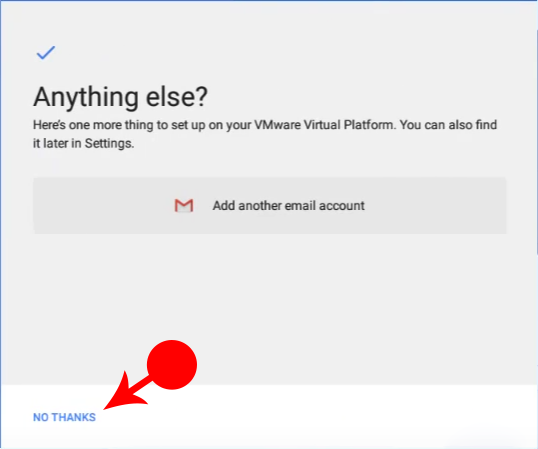
Step 10. Then again it will ask about he Google account. Just click on NO THANKS.
Congratulation! You have successfully installed Android 8.1 Oreo for PC in windows 10 using VMware.

Video Guide To install Android 8.1 Oreo on PC
Here is Video guide where you will learn to install android 8.1 Oreo on PC with step by step.

Conclusion
I hope, everything has been done successfully without any problem. However, if you want ask something for want to add your feedback. Please write that in comment box below. We will be more then happy to help you.