In this article, you will learn how to change Facebook page name 2020. As you are aware that brand name is very important for the organization, institute, company or business. Therefore, most of the time initially we ignore the brand name. Similarly, we also make the same mistake while creating a new Facebook page for businesses. Afterward, we recognize the mistake and would like to change Facebook page name.
Contents
Change Facebook Page Name:
- First, open Facebook Page which you want to change the name.
- Check on the left menu.
- Click on About.
- You will see the General. Therefore, check the name and there is Edit. Click on it.
- Further, you will get the Request new Page name.
- There is an option for the New Page name.
- Change page name and click on Continue.
- It will ask about the Confirmation. Therefore, you have to click on Request Change.
- Congratulation, you are done.
Change Facebook Page Name
Change Facebook Page Name
Still, you have a problem with this quick manual. Then don’t worry. I will make below thorough instructions where you can change the Facebook page name.
related:
-
How to Download YouTube Videos Free on iPhone, iPad & Android
-
Can’t Install Messenger on Android: Facebook App & Messenger Fixed
Step 1. Open Facebook Page
If you don’t know where is your Facebook Page located. Then how you can change the name. Therefore first, you have to open https://www.facebook.com/pages/ in your browser. Further, you will see an option for Your Pages. Click on it.
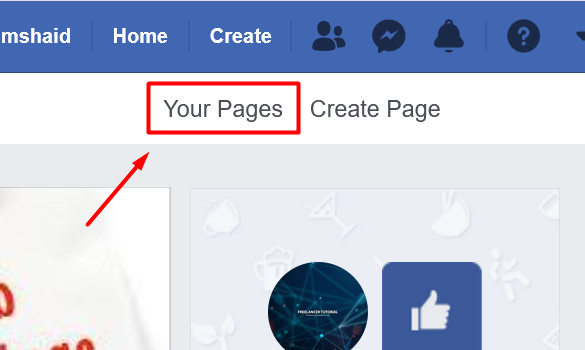
Your Page
Similarly, you have to click the Facebook page in which you want to change the name.
Step 2. About Page
Most of the time people make a mistake while changing the Facebook page name. Therefore, they find the option in the page setting. Initially, i have also made the same mistake. However, you have to check out on the left menu. Where you will see an option for About. You have to click on it to open.
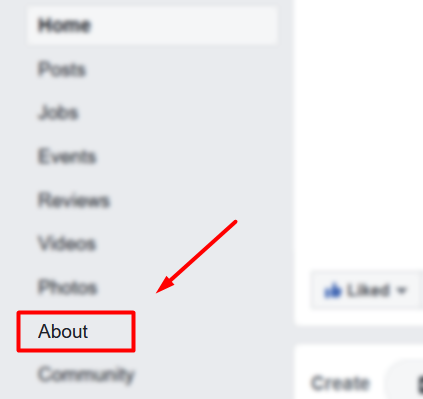
about page
Step 3. General Info Page
Further, you will see all the information about your page in the About section. Therefore, there are many categories like General, Page Info and Contact Details. Moreover, you can change any of these options. However, for the changing name you have to find out Name.
Step 4. Change Page Name
It’s time to change page Name. Therefore, you have to click on Edit.
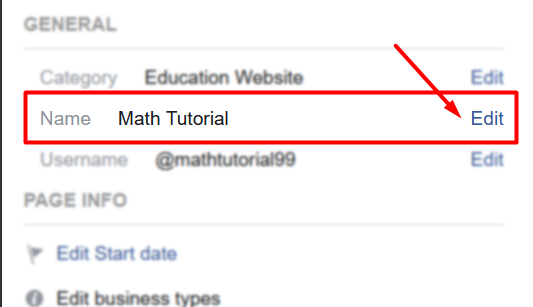
change page name
Further, you will get a new dialog box. Where you will get further details. Therefore, you will get two options for the Current page name and New Page name. A new page name is an option where you have to change the name of the page.
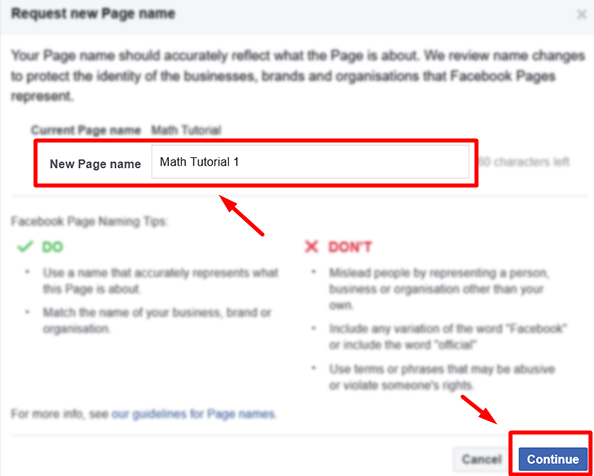
Request new Page name
You have to write the name which you want to change. However, remember that. You must change the page name according to the contents of your page. Because, after changing the name, Facebook takes it to approval. If the new page name won’t reflect your contents of the page. Then Facebook will not approve the change to Facebook page name. Therefore, you have to take it serious.
Once, you have to change the name Then you have to click on Continue.
Step 5. Confirm Change Name Request
Finally, you have to confirm name change request. Once, you have confirmed. Then Facebook will take it to review and it may take up to 3 days and require additional information. If your name change is approved, you won’t be able to unpublish the Page or change the name again for 7 days. During this time, we may also let the people who like your Page know that the name’s been updated.
Step 6. Video Guide
Here is a video Guide Where I will show you about every setting and information. Therefore, you have to watch the video to get clear idea.
Conclusion:
I hope you have successfully changed the Facebook page name. However, if you have any problem then you can write that in the comment box below. I will be happy to reply back. Thank you.

MUHAMMAD SOHAIL
Thanks for information