In this article, you will learn how to increase and extend C Drive in Windows 10 without formatting. As you know that sometime, you may forget to give C drive more space at the time of partition. Therefore, after installation, it will be difficult to take memory from other drives (for example D or E drive) and marge it to C drive. But, in this article, you will learn a very simple method to increase and extend C drive in windows 10 without losing and formatting your data.
Extend C Drive in Windows 10 Without software

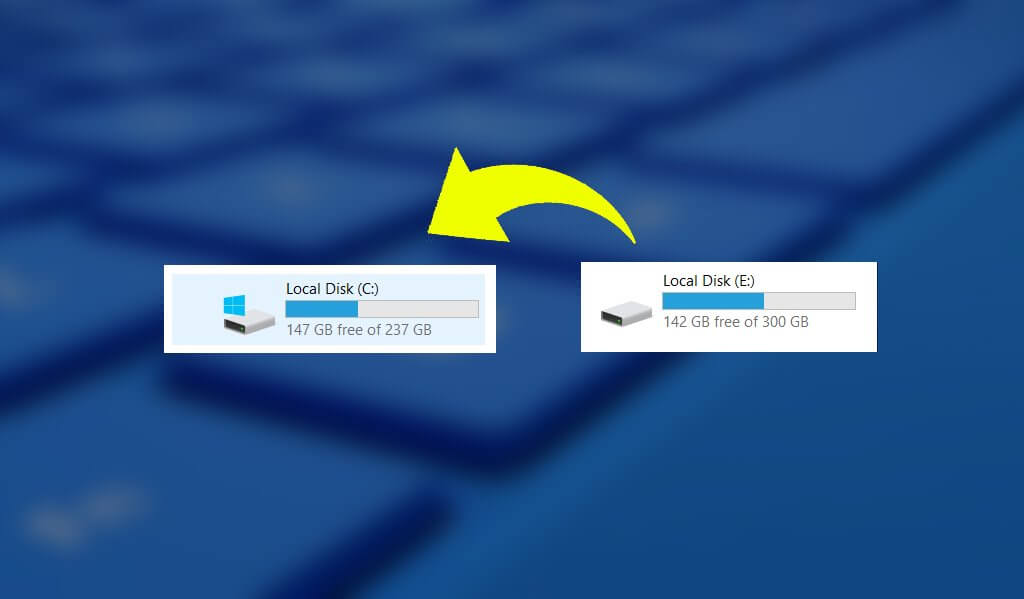
Extend C Drive in Windows 10
You may also want to know that. either it is possible to extend C drive in Windows 10 without software or not. The simple and straight answer is big No. You cannot extend C Drive in Windows 10. Because there are many limitations which will stop you to extend one drive to another drive. Especially, if we talk about C drive. Again, if you want to extend C drive without software. In other words, if you are going to extend C drive manually. Then it is difficult to do. Doing anything manually take too much time and energy. Therefore, the programmers have designed and developed software. And the task of the software is to overcome the problem with ease. Therefore, here we are going to extend C drive Windows 10 with Software.
Extend C Drive in Windows 10 using cmd
CMD which is called Command Prompt. From its name, it is clear that. When you are going to write command to complete it will operate. You can extend C drive with CMD. But it is only possible when you are installing your Windows. And by extending C drive from Command Prompt you will also lose your data. Therefore, don’t try to use CMD.
Extend C Drive Windows 10 Disk Management
Disk Mangement is another option where you can extend C drive. In addition, Disk management is specially designed in Windows 10 to see the configuration for the drive. With disk management, you can attempt different operation. For example, you can delete, formate and split the drives etc.
However, there is some restriction. Where you cannot take memory from another drive to C drive. There no such option for extending the drive.
Extend C Drive with Unallocated Space in Windows 10
Under those circumstances, when you are going to extend C drive with unallocated space in windows 10. You can only do that with software. You can check the software here. Without software it is impossible. The reason, why unallocated space can not more to c drive is that. When you delete your drive after dividing it. Then the extended partition will move away from C drive. Therefore, when you are going to merge that partition. It must be on the side of C drive. But, directly doing from Disk Management. The partition will move next to the drive from where you have split that.
Therefore, to overcome this problem. We are going to do that with software. Why that can be done? You are going to understand from the below.
Extend C Drive Windows 7 & 8
Most of the software is applicable only for some specific windows. Unlike, all those windows. This procedure and method will work on all windows. Which includes Windows 7, Windows Vista, Windows 8 and Windows 10. Therefore, if you are using any one of these operating systems. So, Without any confusion, Just start to increase and extend C Drive quickly.
AOMEI Partition Assistant
AOMEI Partition Assistant is Free disk partition management software. Where you can easily configure and manage your computer hard drive partition without losing and formatting data. It comes with so many powerful features that allow you to completely control your hard disk and partitions. For example, the “Extend Partition Wizard” enables you to increase partition size to solve low disk space problems, or you can flexibly manage disk space with “Resize Partition”, “Merge Partitions”, “Split Partition”, and “Copy Partition”.
Features
- Change partition size without losing data
- Extend NTFS partition without restarting the computer
- Move free space from one partition to another
- Merge two adjacent partitions into one
- Split a big partition into two small one
- Make a new partition to store various data
- Delete unnecessary and useless partition
- Change file system and empty all data
- Migrate system to the solid-state drive (SSD)
- Clone a disk from one to another
- Clone a partition to other location
- Convert dynamic disk to basic without
- The Convert between MBR disk and GPT disk without loss of data
- Convert NTFS to FAT32 partition with no data loss and vice versa
- The Convert between the primary partition and logical partition safely
- Create Windows PE bootable media without having to install AIK/WAIK
- Install Windows 10/8 to a USB flash drive or a removable disk
Requirement
- CPU: at least with X86 or compatible CPU with main frequency 500 MHz.
- RAM: equal or larger than 380MB.
- A Microsoft operating system with mouse, keyboard and color monitor.
- Traditional hard disk drive (HDD), solid-state drives (SSD) and SSHD.
- Full support all hardware RAID, such as RAID 0, 1, 5, 10, etc.
- Support USB 3.0/2.0/1.0 disks.
- The Support MBR disk and GPT disk including 16TB+.
- Support up to 128 disks in one system.
- A removable device, all of the flash drives, such as PC card, thumb drives, memory card, memory stick and so on
- Completely support hard disk with 4096, 2048, 1024, 512 bytes sector size.
- Support virtual disk partition in VMware, Virtual Box, and Virtual PC etc.
How to Install AOMEI Partition Assistant
For this reason, installing the AOMEI Partition Assistant. First, you have to download the setup file. Find the link below to download AOMEI Partition.
further, after downloading the file. You have to carefully follow all these steps to install the software in your machine.
Related: How to Extend C Drive in Windows 10 Without Software
Step 1. You have to double-click on step file. Moreover, you will ask for Select the language to use during the installation. There are many language options. Select the one which you are comfortable for. In my Case, I have selected English.

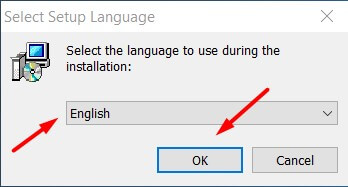
Language selection
Step 2. Further, In this step, The Welcome Screen will appear. You just need to press Next. The second screen will ask about Licencese Agreement. Select I accept the agreement. And Click Next.

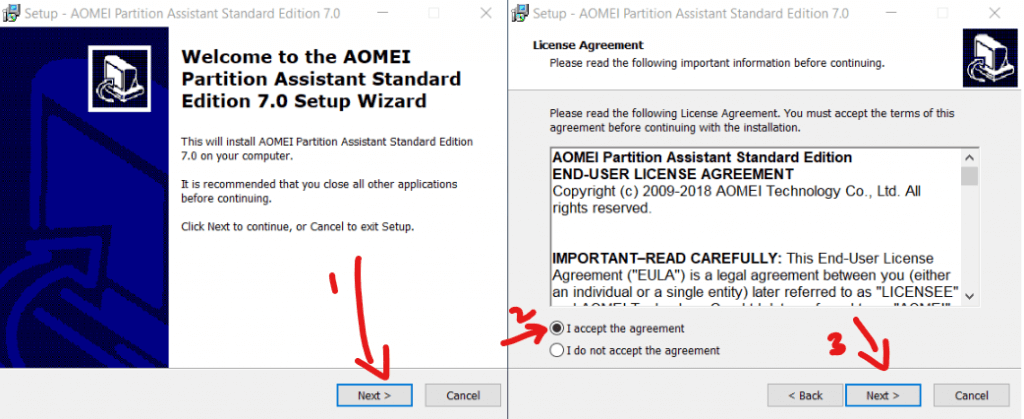
Welcome and Agreement Screen
Step 3. Similarly, Next Screen will give you simple information about the software. Just click Next.
Step 4. In like manner, on this page, you have to select the Destination Locations. or Just click on Next.

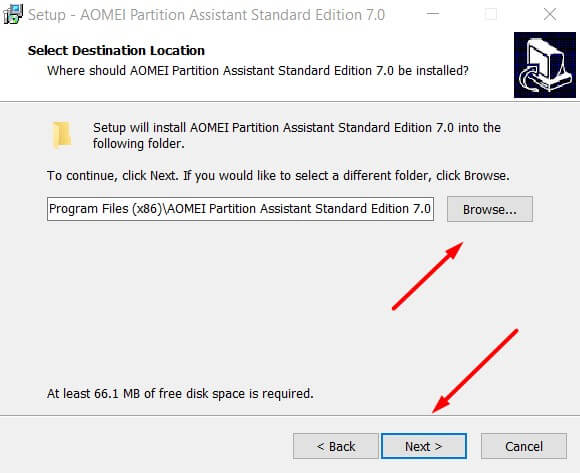
Destination Location
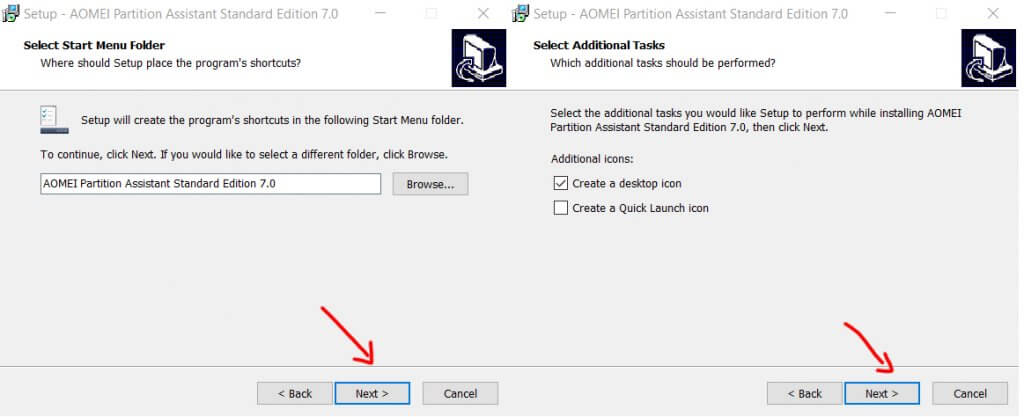
Step 5. Further, the setup will ask about the program’s shortcut in the start menu folder. Moreover, I recommend you to just click Next. Again, the next window will ask about additional tasks. Just click on Next.

Short-Cut – Additional Task
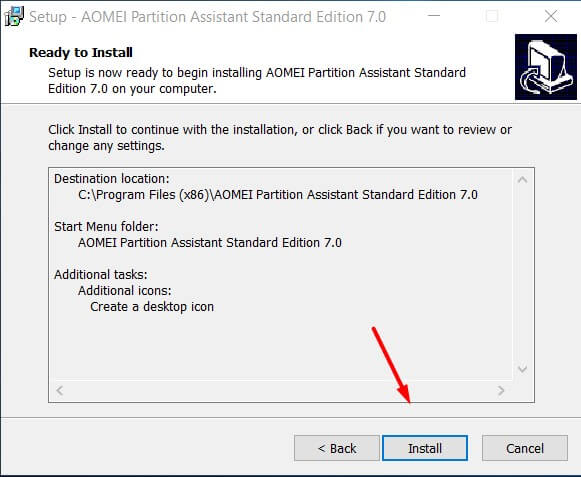
Step 6. By all Means, you are ready to install. Just Press Install. The installation will start and the software is ready for use.

Read to Install
Finally, Congratulation. You have successfully installed the software. On the positive side, Now you are ready to increase and extend C drive in Windows 10.
Extend C Drive in Windows 10 with AOMEI
Follow these steps to extend C drive in Windows 10 with AOMEI
step 1. Open AOMEI Software. Here you will find the different configuration of your all disk. Since I am using to the hard drive. You can check the first Disk 1 is 698.64GB. The Second drive is Disk 2 which is 238.47GB. The Disk 1 is HDD and the second one is SDD. However, for the purpose of this tutorial. I am going to operation on Disk 1.

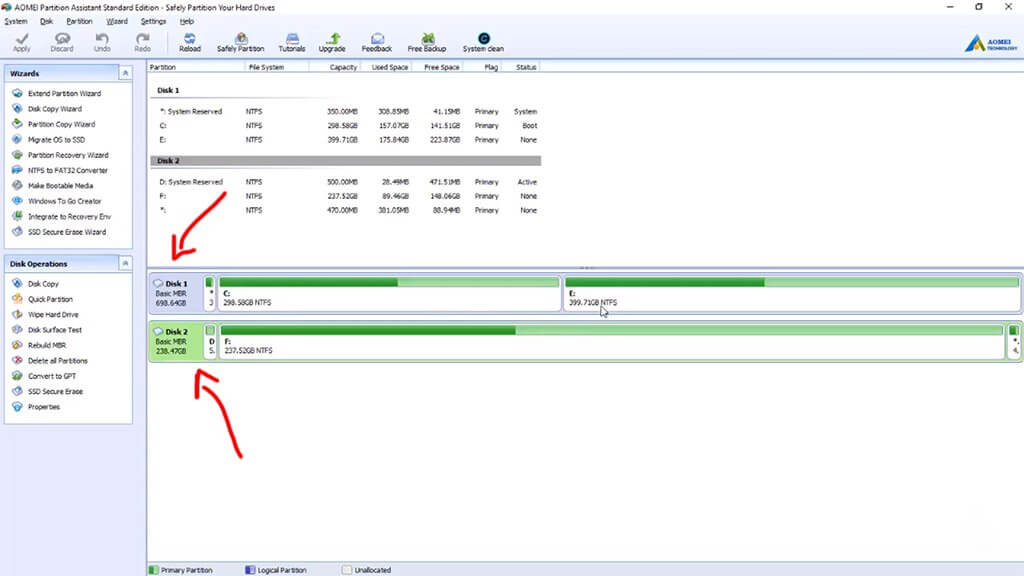
Extend C Drive in Windows 10 Disks
Step 2. Next, we are going to take 2GB from E drive. And extend that into C Drive. for that you have to Right Click on E drive. You will get many options. The you which you are going to select. That is Split Partition. Click on it.

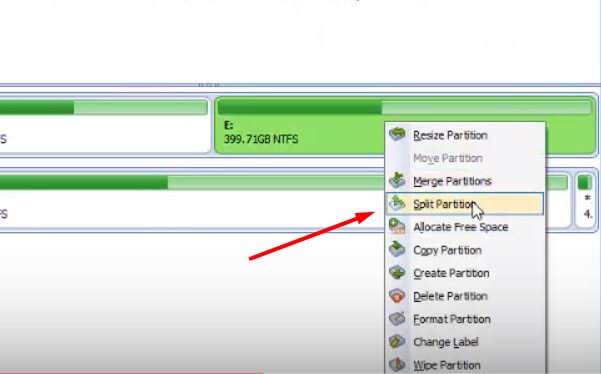
Split Partition
Step 3. Now you will get the Split Partition Window. Further, you can see two drive. One E drive and second G drive. G drive is the drive partition which you are going to cut. And send it to C drive. Therefore, in New partition size, we are going to enter 2GB and press OK.

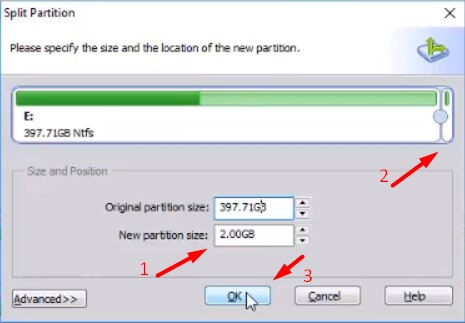
2GB split Partition
Step 4. In the main Window, you are going to see one new drive. And that is G Drive.

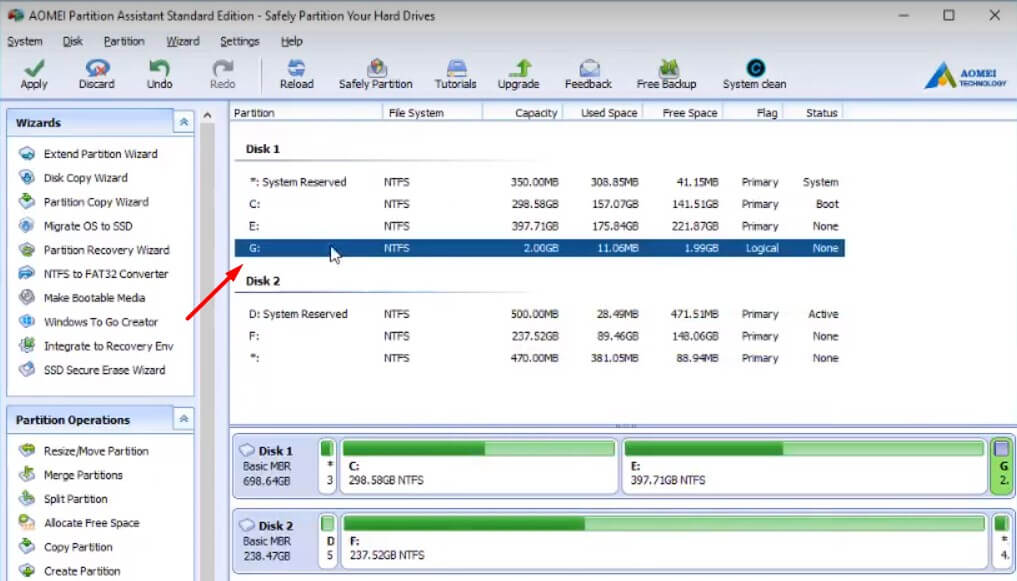
G drive partition
Step 5. The last block is G drive and you have to delete that. For that Right Click on the G drive and there you have Delete Partition. Click on it.

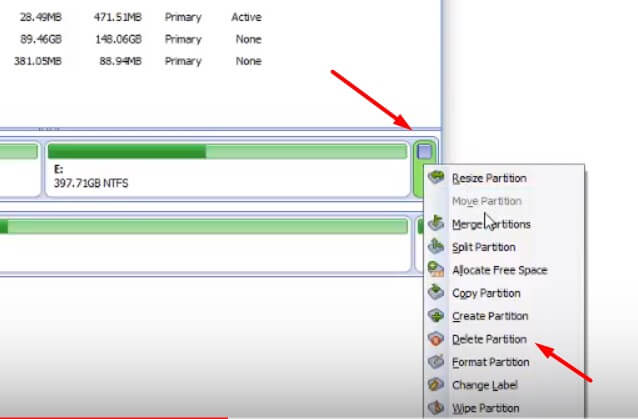
Delete Partition
Step 6. In this step, you are going to see in the main window. That instead of G, there is a * sign. In front of it, Unallocated is written. It means now you can take it to C Drive.

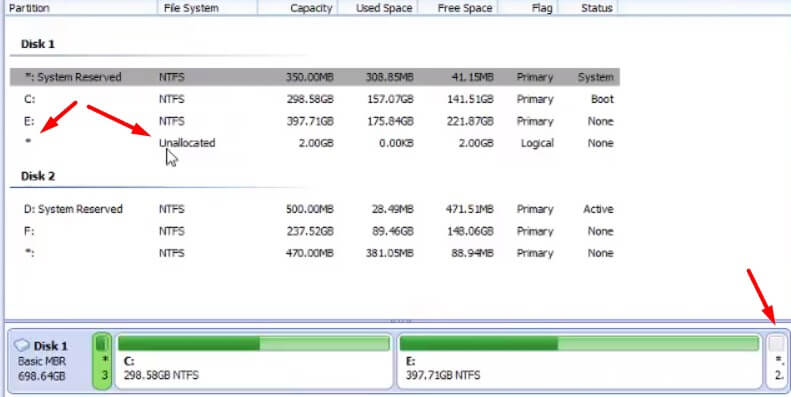
Unallocated Drive
Step 7. Next, we are going to Right Click on C Drive and there is an option for Marge Partitions. Click on it.

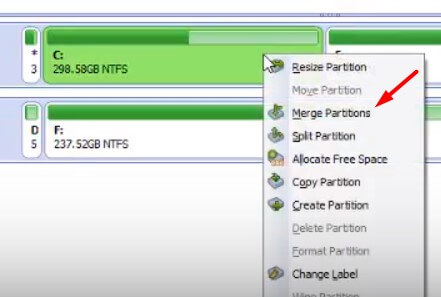
Marge Partitions
Step 8. The Marge Partitions window will appear. You will find all your drive will display. Since you are going to marge and Extend C Drive. Therefore, you have to click on the checkbox on the left of C Drive and Unallocated and Press OK. What will happen? When you are going to press OK. The partition will add 2GB to C Drive. Therefore, we will extend C Drive with 2GB. In addition, C Drive will convert from 298.58 GB to 300.58 GB.

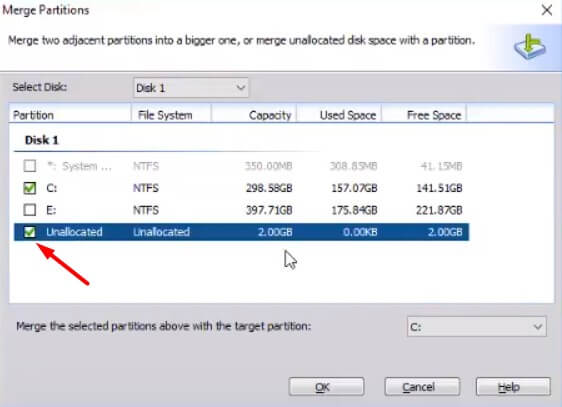
Marge Partitions Window
Step 9. Now in the main window, you can see C drive is showing 300.58GB. It means, we have successfully done everything completely right. Further, you are going to click on Apply.


Apply the partition
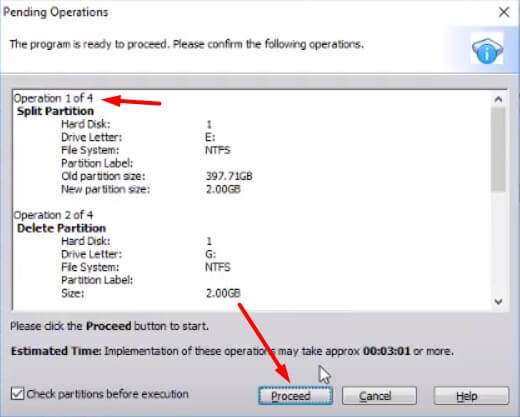
Step 10. Moreover, the Pending Operations window will appear. Further, it will show you the detail for Operation. Which will be in 4 step. Thus, you just need one last step to click on Proceed.

Pending Operation Window
Congratulation. You have successfully Extended C drive in Windows 10.
Conclusion:
I hope you have learned something new and valuable. But there is always room for improvement and there may be some mistake. If you want to ask a question. Or you want to provide your feedback. Don’t hesitate to ask that in the comment box below. We will be more than happy to reply and appreciate your comment as well as your feedback.