Creating a bootable Windows 10 USB installer can be very useful in a number of situations. For instance, you may want to install Windows 10 on multiple PCs and you need something portable. Or else, you may want to create a dual-boot Mac computer with Windows 10 and macOS. Or, you may just need something handy to carry around for troubleshooting Windows 10 errors. Whatever the scope of your requirement, the process to create USB installer on Windows is very easy. The real challenge is when you want to do this on a Mac. So, why is it so hard to do, and is there an easier way? Let’s explore the answers to those two very critical questions.
Why is the Current Method So Difficult?

Create a Bootable Windows 10
As you know, the Mac environment is not natively compatible with Windows. Even though you can do a dual boot or Hackintosh with both Windows and macOS on a Mac computer, they’re still independent of each other. In the past, it was easy to use Boot Camp Assistant to do this. It supported most Windows versions and was basically a native Mac app so it worked fine. However, with the advent of Windows 10, all that changed.


install wim too large
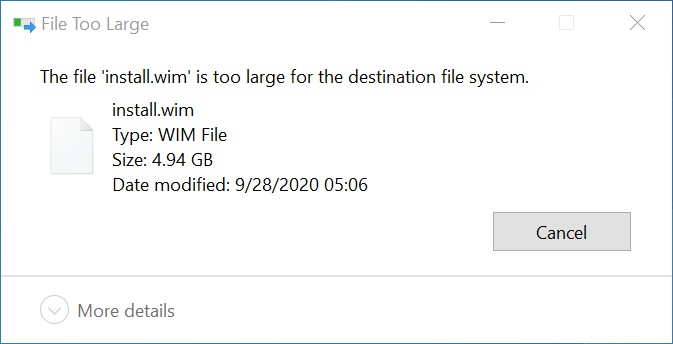
One of the major reasons why you can’t create a Windows 10 USB installer on macOS is that the install.wim file contained in latest Windows 10 ISO is 5.3GB. That would not be a problem under normal circumstances, but since you’ll need to use the FAT32 file system to format the USB on a Mac, it will conflict with the 4GB limit that this file system allows. That means you will need to split the .wim file. The following is an example of Windows 10 (20H2) ISO downloaded from Microsoft website.

wim file too big
Tips: NTFS is not supported by Mac natively so you can not write files to a NTFS partition on Mac. This is the reason why we have to cut install.wim into small pieces that is less than 4GB in order to sit on a FAT32 partition.
For that, you need an open-source utility like wimlib. However, that involves using Homebrew on your Mac. Unless you have some experience using command-line tools, this is going to be a painstaking process where anything could go wrong and there’s no customer support to bail you out. What you’ll end up doing is reading dozens of forum posts trying to find the exact solution to the problem you’re facing… and there’s no guarantee it will work. Even worse, you may end up breaking your Mac if you run a wrong command because you’ll be doing all of this in administrator mode.
If you want to avoid going through all that trouble just to create a Windows 10 USB installer on Mac, the best alternative is to use a third-party application that does all the heavy lifting for you. That’s what the next section talks about.
The Easier Way to Create Bootable Windows 10 USB on Mac: UUByte ISO Editor
The one major reason this software comes highly recommended, even by professionals, is that it is extremely simple to use. Even if you have absolutely zero experience creating a bootable Windows 10 USB installer in macOS, all it takes is a couple of clicks to get you there. And if you’re already a pro, it puts several other ISO tools at your disposal, as we’ll see later on. Let’s look at the overall process of creating a USB installer for Windows 10 on your Mac. The process is essentially the same for all macOS versions up to and including the latest macOS Big Sur.
As a first preparatory step, you need to get a USB drive of at least 8GB capacity, but 16GB is better. If you have anything on it, take a backup because it will be formatted and all the data on it will be wiped. If you’re using a non-formatted or new USB stick, you can use it as it is.
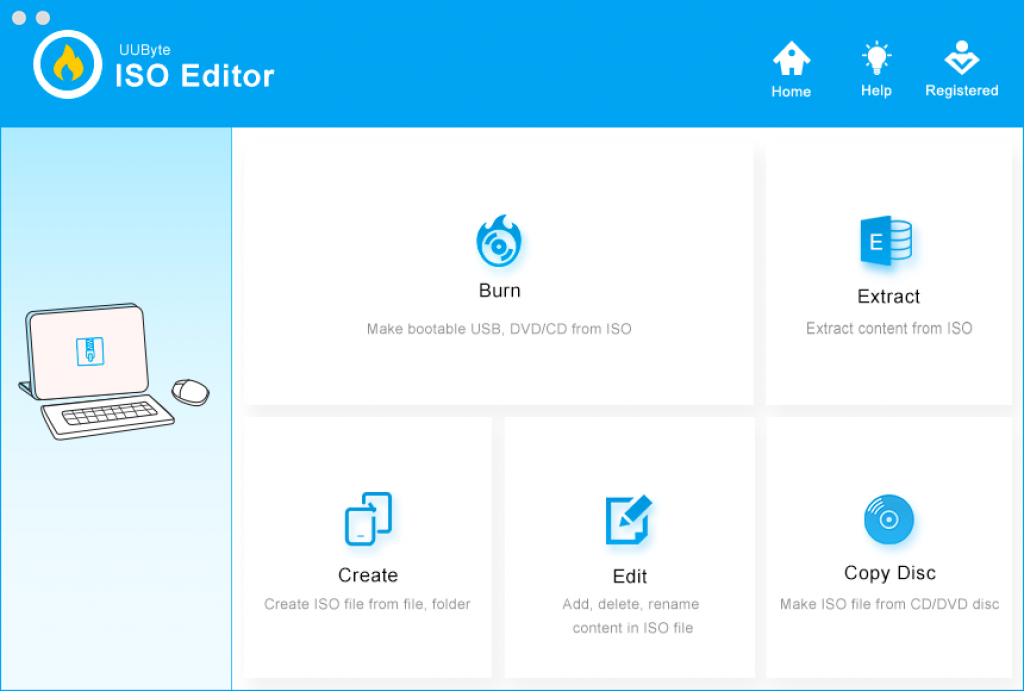
Next, get the ISO file for Windows 10. For a clean install, you can get it directly from Microsoft’s servers here. Since you’re doing it on a Mac, you will bypass the Media Creation Tool and will be able to directly download the ISO file to a local Finder folder. Finally, download and install UUByte ISO Editor for Mac and launch the application. Be sure to click the radio button for the Mac version before you download it – you need the DMG file.

iso editor main
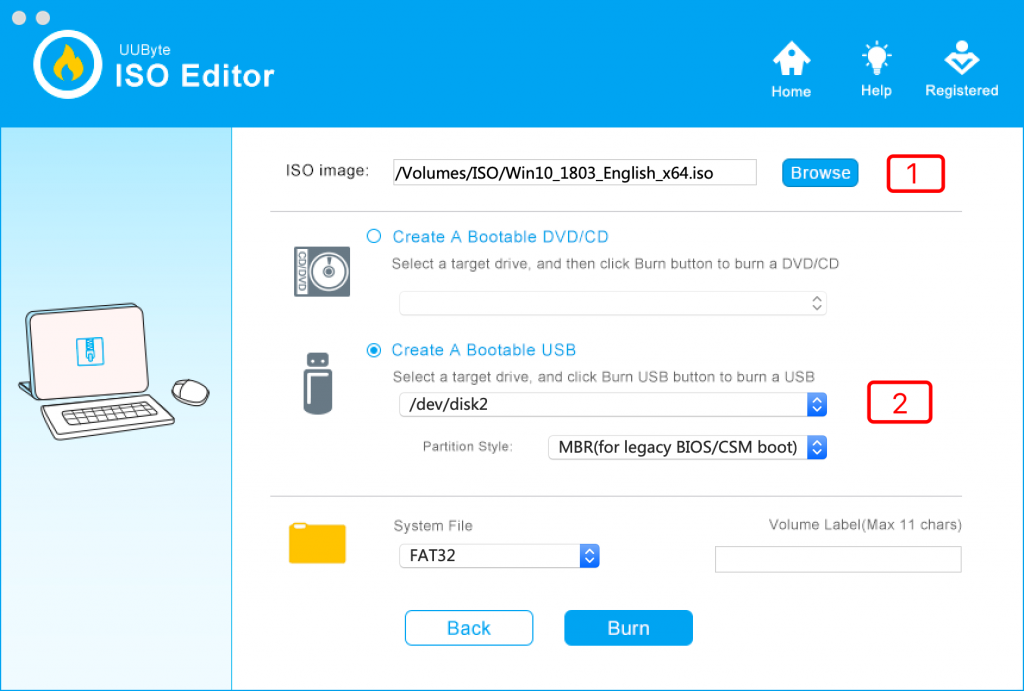
Plug the USB drive into an available port and click the Burn module in UUByte ISO Editor. On the next page, you’ll be able to see your drive identified and certain default parameters set. Choose and import the ISO file at the top section of this page. All you need to do is hit the Burn button and wait for your installer to be created. You’ll see a success message when it’s over.
iso editor burn
Your USB installer for Windows 10 is now ready for use! You can now install Windows 10 on any PC or use it to dual-boot your Mac with Windows 10.
Benefits to You
Why take the hard route when you can easily get the job done in a few clicks? The reason UUByte ISO Editor is so popular is that it also comes with several other modules to edit your ISO files, extract content, copy to ISO, etc. In short, it’s a comprehensive ISO management tool that gives you an error-free experience time after time. Moreover, there’s also a Windows version that’s equally simple to use. Take it out for a spin and see what a difference UUByte ISO Editor will make to your productivity when working with ISOs.